Depixelate Low Res Images to High Resolution using Photoshop & Lightroom
Due to various reasons your great photos may get pixilated that reduces the quality of your photos. You cannot use these images for any important purposes- whether it is personal or commercial. If it happens to you, don’t worry, you can get rejuvenate your photo into high resolution photos using different image editing tools like: Adobe Photoshop, Adobe Lightroom or Photoshop & Lightroom combined. Here, in this content we are going to share several step by step techniques on how to depixelate photos DIY.
There is a warning tough. When you have a pixilated images with very low resolution, it means there are pretty less amount of details available in the image. So, do not expect that you will be able to retrieve a stunning output, without adding more detail. But, you really can destroy the noise created by pixilation and have a smooth feel to the image. This tutorial is based on destroying these noises.
Depixelate Photos Using Photoshop
If your images get pixelated and if you want to get back those into original pixels or high resolution images, you can do it yourself using Photoshop. You have to follow some steps we are sharing for you.
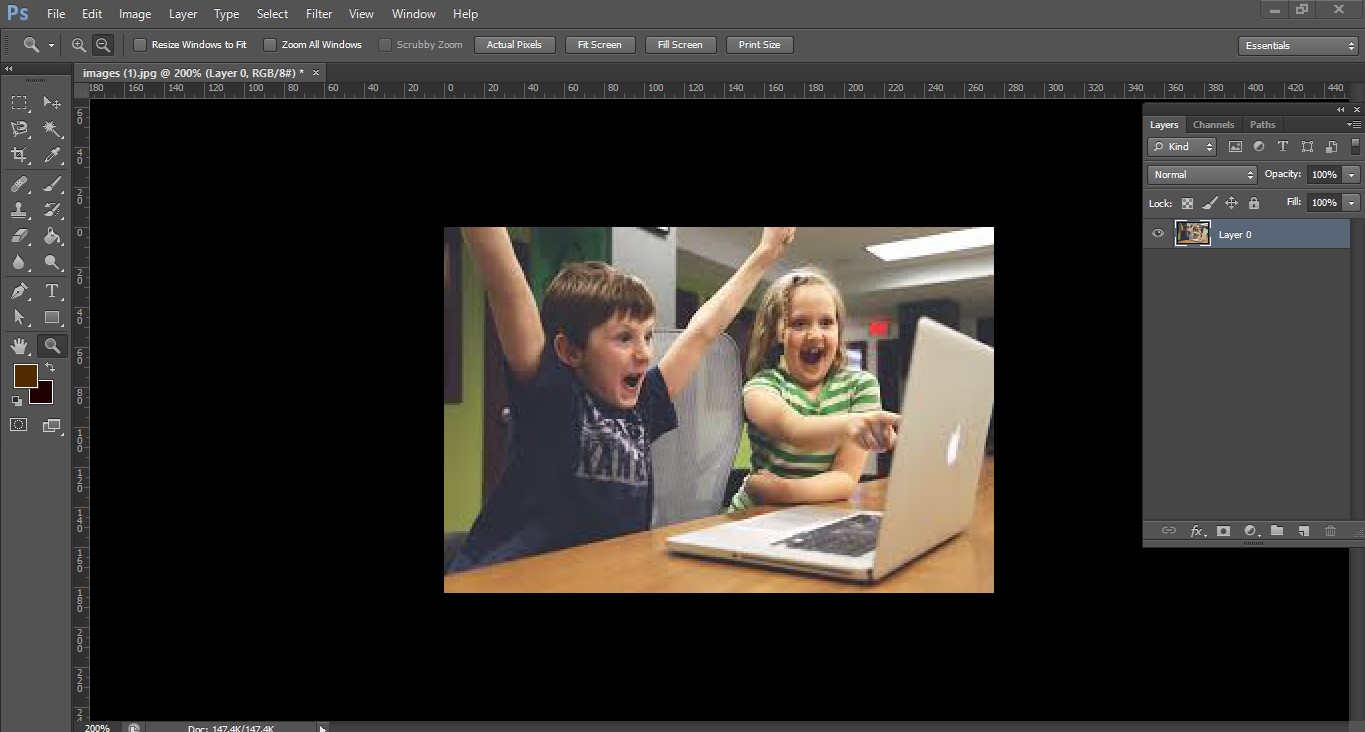
For increasing image resolution and quality, firstly open your low resolution image in Photoshop. We’ve used a low quality image in Photoshop for this experiment.
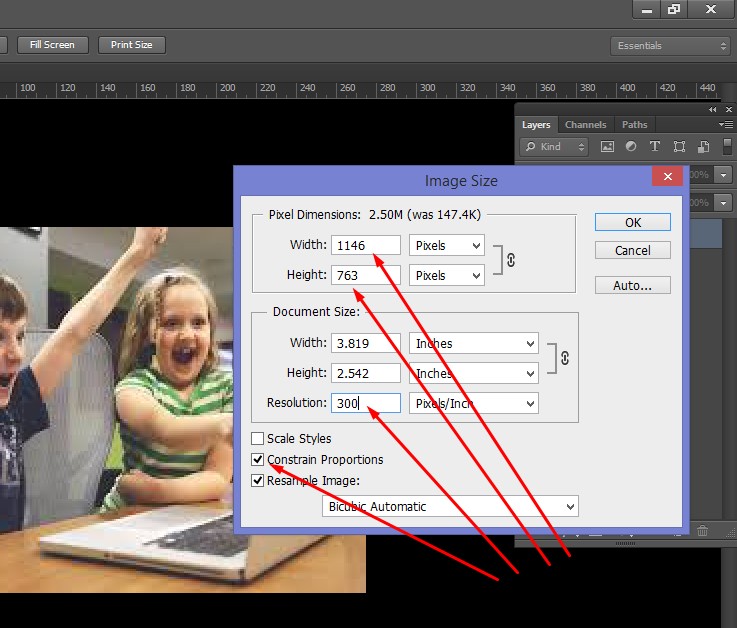
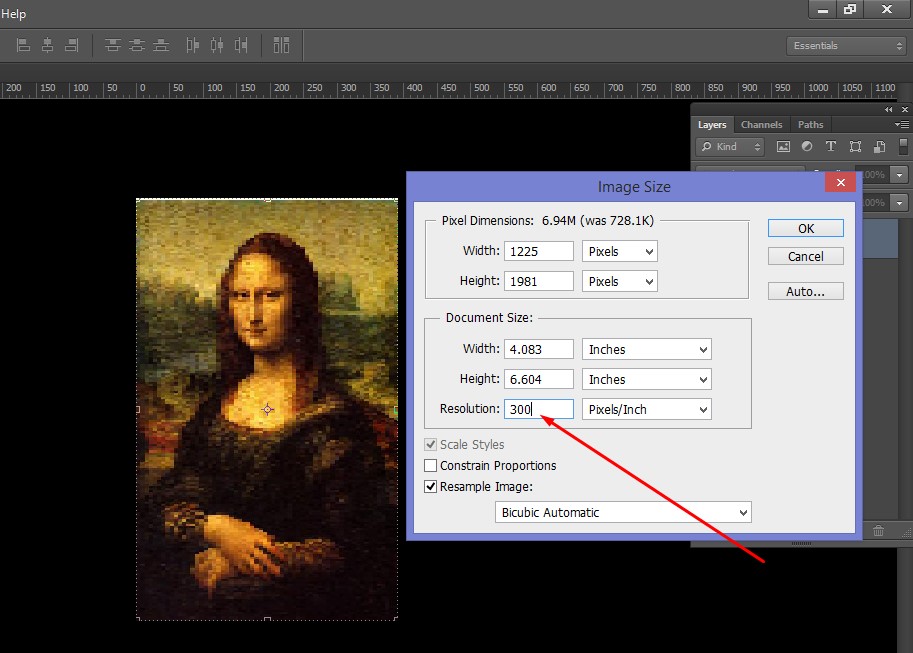
Go to Image from the top-bar and select Image Size for increasing resolution.
Here, you will get a pop-up box, tick on the check box of Constrain Proportions, change image resolution from 72 to 300 pixels, and click on OK. It will increase your image size.
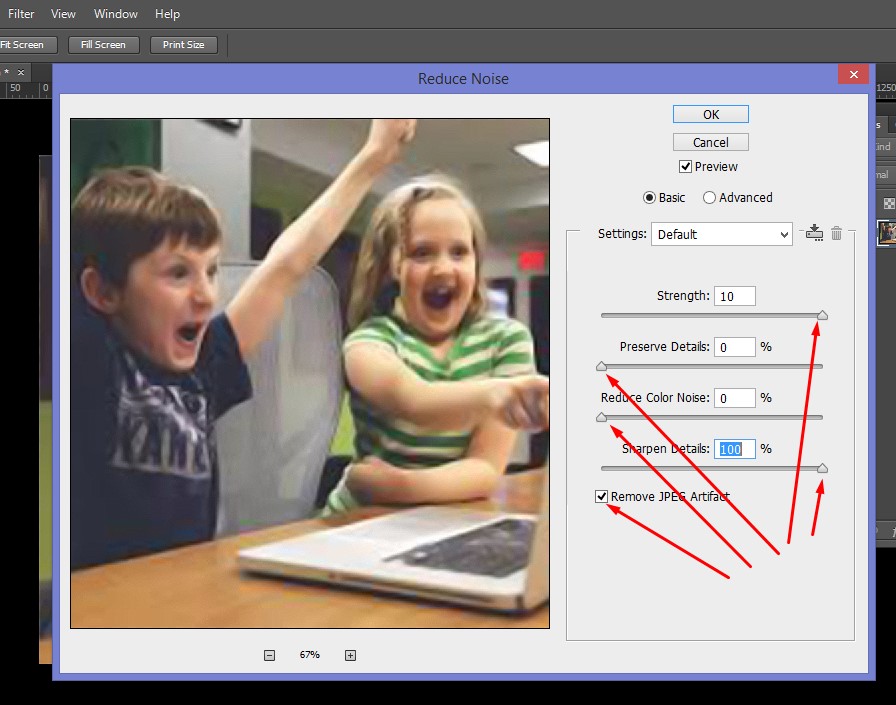
Next, go to Filter, select Noise from the dropdown, and click on the Reduce Noise. See the image below.
Then, move every slide according to the requirement of your images. We have increased or decreased as our experimental photo needs that shows in the attached screenshot and click on OK.
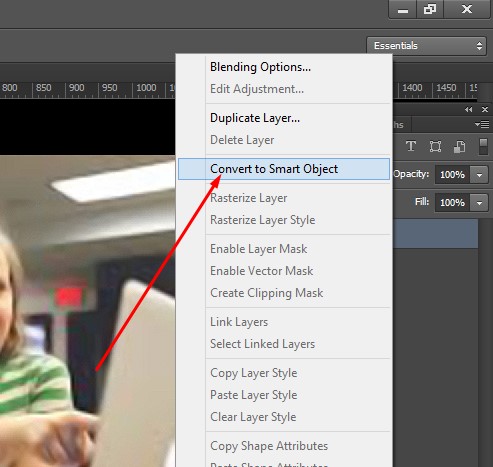
Go to layer palette, click right button of mouse on the image layer. You will get a dropdown and click on the Convert to Smart Objects.
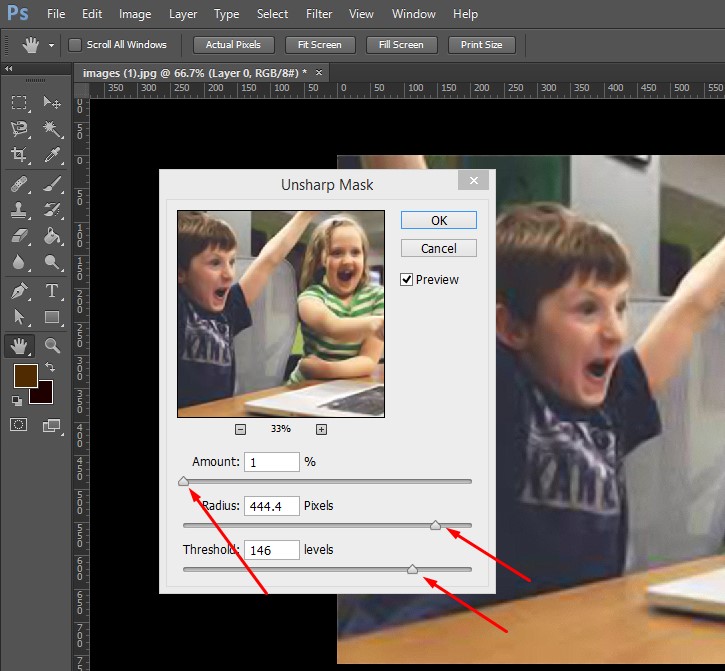
Click on the Filter, select Sharpen from the dropdown, and then click on the Unsharp Mask. Follow the image below.
You would get a pop-up box and move the slides as your photo requires.
Anyway, if you follow this process step by step, your image will be depixelated and get a high resolution image from low resolution.
The image below is the output of our experiment.
Depixelate Photos Using Photoshop & Lightroom Together
You can sharpen or resize images without losing quality using Photoshop and Lightroom combined. It is an easy process, just you have to know some certain steps. So, here we go-
At the very first time, open your low resolution photo in Photoshop. Go to Image option from the top bar. You will get a dropdown option list and click on the Image Resize.
From the pop-up form, change the Resolution value 72 to 300 pixels. You can notice that your image size has been changed smaller to bigger. Then press OK.
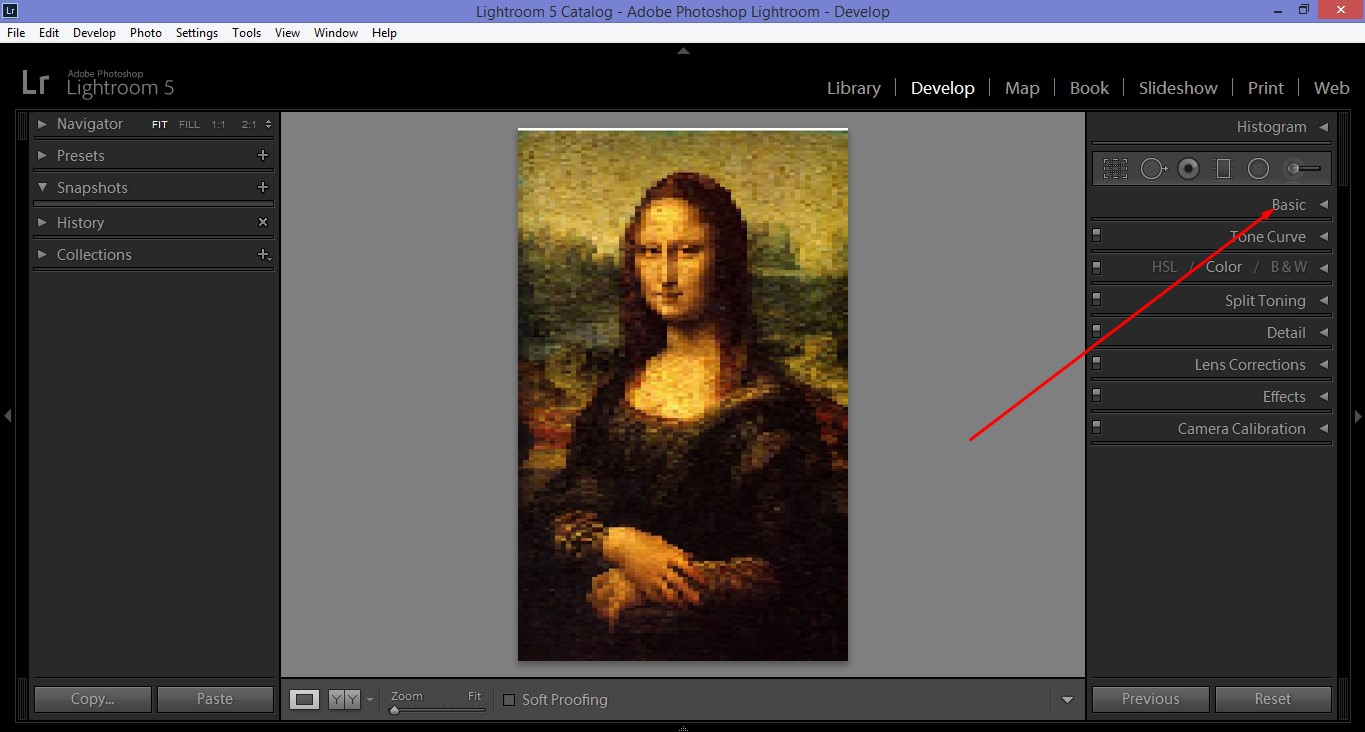
So far it looks good. That’s all in Photoshop and now, you have to open this image in Lightroom for converting low resolution picture to high resolution.
See the screenshot below, we have opened our image in Lightroom and then selected the Basic option.
In this option, we have move the slides of Move it as your image needs.
Next, got Detail option and increase or decrease the Amount slide for sharpening your image. Here the most important tool is Luminous for Noise reduction. Move the slide of Detail and Contrast for fixing blurry image. You have to change all the slides according to your image requirement.
Anyway, that is all about step by step tutorial on fixing blurry picture in Photoshop Lightroom. The two before after images are given below for your better understanding. See the first image pixilated and the last one is depixelated that is the outcome of our experiment.
Depixelate Photos Using Photoshop High Pass Filter
For fixing blurry photo by using Photoshop High Pass Filter, you should do some basic task of resizing the images. What we mean is that firstly open your image in Photoshop and increase pixels from 72 to 300 as you did for other images earlier.
Then, duplicate the image layer and keep it selected as we have shown in the below screenshot.
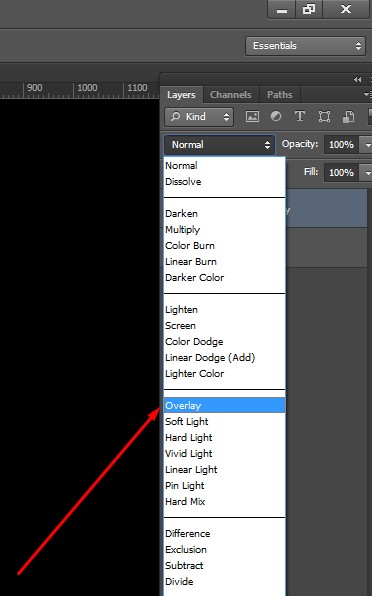
Now select the High Pass filter from the Filter option of Top Option Bar. The layer will get a gray look.
In this stage, set Overlay blending mode for the layer. It will make your photo clearer. To feel the change, off the eye-icon to invisible the layer frequently.
As we have shown in the image below, go to Adjustment layer, select Level, and move slider to make your image a little bit darker that will remove glair. Thus, you will get a clear high resolution photo from low resolution image.
The final output of this experiment is the below image.
By the way, above we have shown three methods of transforming a low quality image into high quality image. These processes will fix blurry photos, pixilated photos, and produce high quality image files. You can do it yourself at home or if you have a bundle of photos, you can contact us and we will help you to fix low resolution images.


