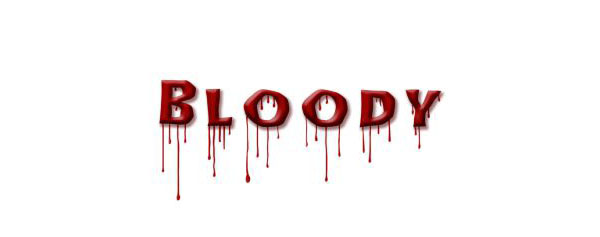
Make Blood Text Effect in Photoshop
Blood text effect tutorial we need font – Gypsy Curse and Organic and Bubble Patterns as a .PAT format. In the .PSD document set in RGB mode. Pixel set at 300 x 400 and White Color Background with 72 DPI. Foreground color set at #333333. While the background layer selected the press alt+Delete (at a time). Which will change to dark grey color of the background. In advanced settings Color Profile will be Don’t Color Manage this Document and Pixel Aspect Ratio will Square Pixels.
Now for the background we need to create a layer. For this choose “Layer from background” through right click on background. Save it the name of as your wish. I saved it as my own name Witsel.PSD. Go from Menu to Layer to Layer Style to Blending Options. Now I will set Blending Mode as below.
Pattern Overlay – Pattern: Set Mode atNormal, Opacity to 61% Pattern – Organic seamless pattern, Scale – 100% also Link with Layer. Press ok.
Inner Shadow – Structure: Set Blend Mode to Linear Burn with color #480000, Opacity – 63%, Angle of 120 degree, Distance set to 0px, Choke at 30%, Size at 133%.
Quality: Contour, Noise – 10%. Then hit OK to set it.
Satin – Structure: Blend Mode at Color Burn with #8d1717, Opacity of 17%, Angle of 19 degree, Distance to 3px, Size at 3px, Contour at Invert. Through clicking OK make sure this setting.
Color Overlay – Color: Blend Mode of Color with #71766a, Opacity at 55%. Don’t forget to press OK.
Gradient Overlay – Gradient: Set Blend Mode of Color Dodge, Opacity – 83%, Gradient Color of #3c2424 and Reverse, Style at Redial also Align with Layer, Angle of 0 degree and scale at 143%. After fixed setting press OK.
Here we will get ready our Background.
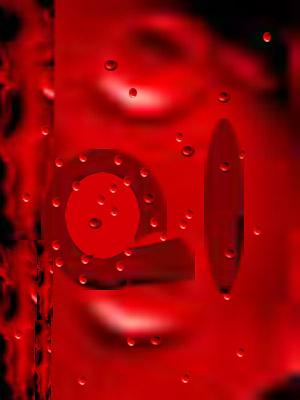
Now write something on the canvas. In which font will be Gypsy Curse, the text will be in center. Where I wrote the word: “Q l”. “L” is in small letter.
From Menu go to Layer to Layer Style to Blending Option, and then set the text as like me.
Drop Shadow – Structure: Set Blend Mode at Linear Burn with color #000000, Opacity – 52%, Angle of (-90) degree, Distance set to 3px, Spread at 0%, Size of 13PX.
Quality: Contour, Noise – 0%. Then hit OK to set it. Another thing is Layer Knocks Out Drop Shadow.
Inner Shadow – Structure: Blend Mode to Linear Dodge (Add) with color #ffffff, Opacity of 19%, Angle of 90 degree, Distance set to 2px, Choke at 100%, Size at 2%.
Quality: Contour, Noise – 0%. Then hit OK to set it.
Outer Glow – Structure: Set Blend Mode atNormal, Opacity – 57%, Noise – 0%. And color at #ff0000.
Elements: Technique will be Precise, Spread to 0%, and Size at 4px.
Quality: Contour with Anti-aliased, Range – 100%, Jitter – 0%. And press OK to confirm the settings. Never forget, otherwise everything can be damaged.
Bevel and Emboss – Structure: Style will be Inner Bevel, Technique of Smooth, Depth at 1000%, Direction – UP, Size – 10px, Soften will 2PX
Shading: Angles at (-90) degree, Altitude at 30 degree. Gloss Contour, Highlight Mode – Color Dodge (Add) with # de0404 and Opacity – 34%, Shadow Mode Color Burn with # 3d0000 and Opacity will be 66%, and then press OK.
Contour – Elements: Range 50% with Anti-aliased.
Texture – Elements: Bubble Pattern, Scale at 12%, Depth set at (+10)% and Link with Layer.
Satin – Structure: Blend Mode at Color Dodge with #ffffff, Opacity at 40%, Angle of 90 degree, Distance to 43px, Size at 21px, Contour – Invert. Through clicking OK save it.
Color Overlay – Color: Blend Mode at Color Burn with #8b0401, Opacity will be 13%. Now press OK.
Gradient Overlay – Gradient: Set Blend Mode to Color Burn, Opacity – 42%, Gradient – #000000 and #fefefe, Style of Linear, Align with Layer, Angle at (-90) degree and scale – 47%. Then press OK and Location at 70%.
Pattern Overlay – Pattern: Set Mode atNormal, Opacity to 61% Pattern – Organic seamless pattern, Scale – 100% also Link with Layer. Press ok.
Stroke – Structure: Size at 1px, Position at Outside, Blend Mode atNormal, Opacity at 100%.
Fill Type: Gradient: Gradient and Smoothness with Location (51% of #6c0000, 55% of #ff1616 and 59% of #00000). Style Linear and Align with Layer, Angle at 90 degree, Scale – 100%. Click OK.
Duplicate text layer in this step. From Menu go to Layer to Duplicate Layer and I saved it as Nahin1.PSD. Save you as like your name. Again go to Menu then Layer to Layer Style and Clear Layer Style. For this here we will create different Layer style. Now move Menu to Layer to Layer Style to Blending Options and set as like me.
Blending Options – General Blending: Blend Mode set atNormal, Opacity – 100%.
Advanced Blending: Fill Opacity – 0%, Channel RGB, Knockout – None (Blend Clipped Layers as group, Transparency Shapes Layer).
Blend If: Gray, This Layer – (0-255) %, Underlying Layer – (0-255) %. Click OK to save it.
Drop Shadow – Structure: Set Blend Mode to Color Burn, Opacity – 32%, Angle at 90 degree, Distance – 2px, Spread – 28%, Size 8px.
Quality: Noise – 0% and Layer knocks Out Drop shadow.
Bevel and Emboss – Structure: Style – Inner Bevel, Technique – Smooth, Depth – 1000%, Direction – UP, Size – 5px, Soften – 4%.
Shading: Angles – 96 degree, Altitude at 37 degree. Highlight Mode – Linear Dodge (Add) with # de0404 and Opacity – 0%, Shadow Mode also Color Burn with # 3d0000 and Opacity – 41%, then press OK.
The Image are here:


