Transformer Text Effect in Photoshop
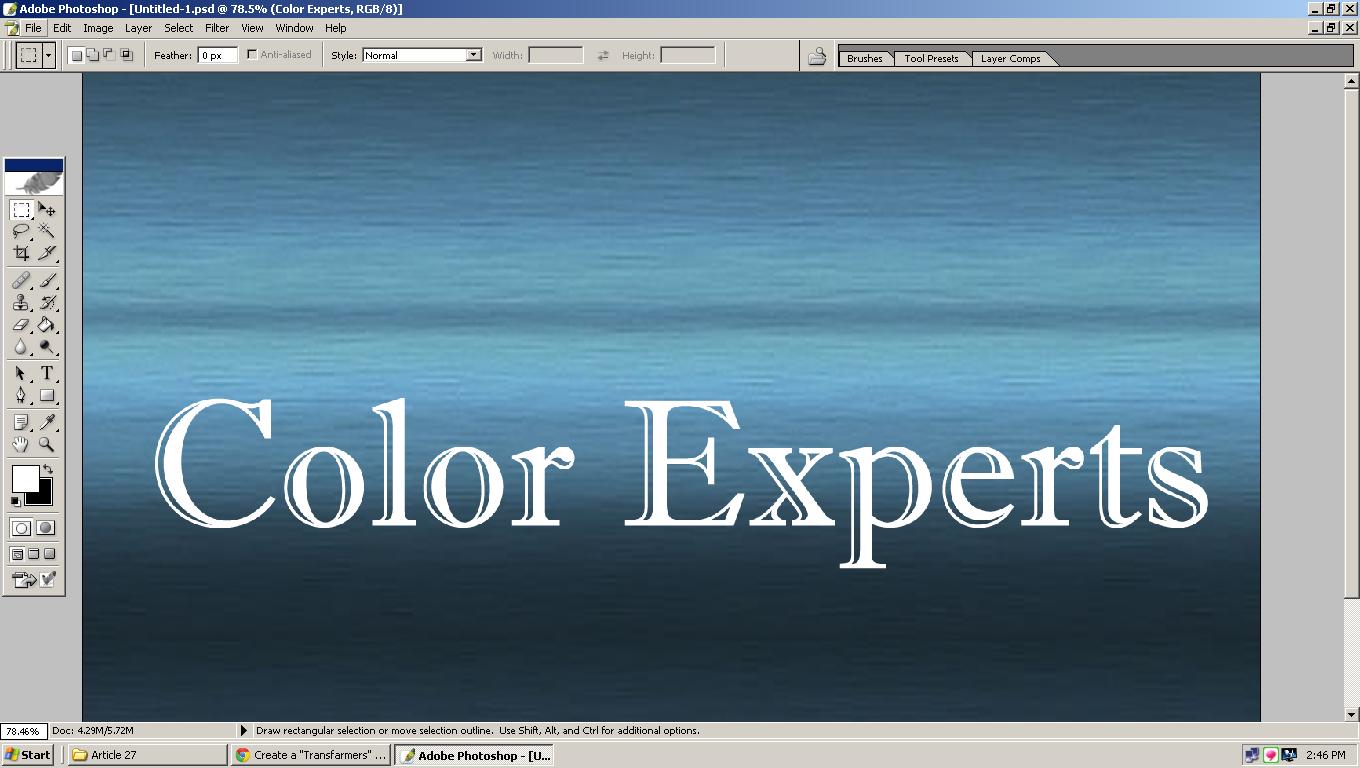
Top create Transformer Text Effect in Photoshop Open Photoshop and create a new document with the size of 1500 x 1000. Choose a background as like you. I choose the following. Set in RGB mode save it as a name. Type something on your background image.
Open Photoshop and create a new document with the size of 1500 x 1000. Choose a background as like you. I choose the following. Set in RGB mode save it as a name. Type something on your background image. Go to the Blending Option and set the following:
Drop Shadow:
In drop shadow set the Structure as given below. Set the Blend Mode toNormal. And set Opacity at 21% with Angle of (120) degree. Then set the Distance to 3px with the Spread of 0% and Size 13px. In the Quality set contour, Noise to 0% and Layer knocks Out Drop shadow.
Outer Glow:
In outer Glow set the Structure as given below. Set the Blend Mode toNormal. In here set Opacity at 62% and Noise 0%. Set the Elements for Technique at softer with the Spread of 0% and Size 18px. In the Quality set contour, Range to 50% and Jitter to 0%.
Bevel and Emboss:
In this step set the Structure. Now in structure Style will be Pillow Emboss, Technique to Chisel Hard, Depth set to 929%, Direction at UP, Size – 4px, Soften – 0%. And set in the meantime shading where Angles at 120 degree, Altitude at 30 degree. Gloss Contour anti-aliased, Highlight Mode with Color Dodge with # 666666 and Opacity will 85%, Shadow Mode also Multiply with # 333333 and Opacity to 73%. Now press OK.
Contour:
Elements: Range 50% with Anti-aliased.
Satin:
Structure: Blend Mode at Soft Light, Opacity at 50%, Angle of 19 degree, Distance to 5px, Size at 16px, Contour – Invert and Anti-aliased. Through clicking OK save it.
Gradient Overlay:
Gradient: Set Blend Mode to Multiply, Opacity – 100%, Gradient, Style of Linear, Align with Layer, Angle at (90) degree and scale – 100%. Then press OK and before pressing ok have to confirm Gradient Type – Solid, Smoothness – 100%.
Pattern Overlay:
Pattern: Set Mode atNormal, Opacity to 87%, Scale – 5% also Link with Layer. Press ok.
Stroke:
Structure: Size at 2px, Position at Inside, Blend Mode atNormal, Opacity at 100%. Set Fill Type to Color with White color.
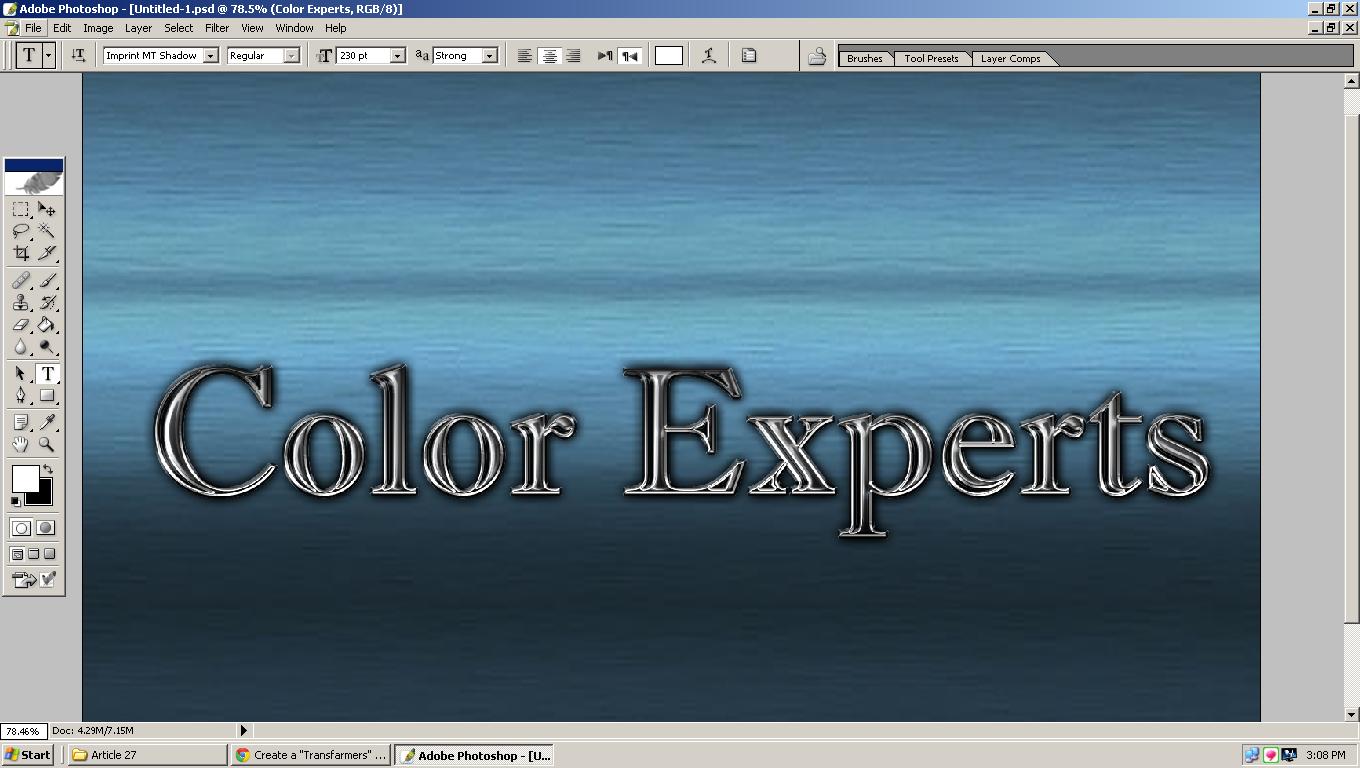
Again go to Blending Option through Duplicate the second Text layer. For these to go to Menu to Layer and select duplicate Layer. Save this file as your wishes name. For these go to again Blending options and set the following.
Drop Shadow:
In drop shadow set the Structure as given below. Set the Blend Mode to Multiply. And set Opacity at 100% with Angle of (120) degree. Then set the Distance to 2px with the Spread of 0% and Size 6px. In the Quality set contour, Noise to 0% and Layer knocks Out Drop shadow.
Inner Shadow:
In Inner shadow set the Structure as given below. Set the Blend Mode multiply. Set Opacity at 100% with Angle of 30 degree. Then set the Distance to 9px with the Spread of 0% and Size 9px. In the Quality set contour, Noise to 0% and Anti aliased.
Inner Glow:
In outer Glow set the Structure as given below. Set the Blend Mode to Color Dodge. In here set Opacity at 100% and Noise 0%. Set the Elements for Technique at softer with the Spread of 0% and Size 10px. In the Quality set contour, Range to 45% and Jitter to 0%.
Bevel and Emboss:
In this step set the Structure. Now in structure Style will be Pillow Emboss, Technique to Chisel Hard, Depth set to 409%, Direction at UP, Size – 3px, Soften – 0%. And set in the meantime shading where Angles at 120 degree, Altitude at 30 degree. Gloss Contour anti-aliased, Highlight Mode with Linear Dodge (Add) with # 666666 and Opacity will 75%, Shadow Mode also Multiply and Opacity to 46%. Now press OK.
Contour:
Elements: Range 100% with Anti-aliased.
Color Overlay:
Color: Blend Mode at multiply with #333333, Opacity will be 60%. Now press OK.
Pattern Overlay:
Pattern: Set Mode atNormal, Opacity to 100%, Scale – 5% also Link with Layer. Press ok.
Stroke:
Structure: Size at 3px, Position at Inside, Blend Mode atNormal, Opacity at 100%. Set the Fill Type to Gradient with Reverse. Style will be Linear and Angle 90 degree and Scale with 150.
Again go to Blending Option through Duplicate the third and last Text layer. For these to go to Menu to Layer and select duplicate Layer. Save this file as your wishes name. For these go to again Blending options and set the following.
Drop Shadow:
In Drop shadow set the Structure as given below. Set the Blend Mode to multiply. Set Opacity at 75% with Angle of 90 degree. Then set the Distance to 1px with the Spread of 0% and Size 5px. In the Quality set contour, Noise to 0% and Layer knocks Out Drop shadow.
Inner Shadow:
In Inner shadow set the Structure as given below. Set the Blend Mode to multiply. In here set Opacity at 75% and Angle of 120 degree. Then set the Distance to 6px with the Spread of 0% and Size 10px. In the Quality set contour to Anti-aliased, Noise to 0%.
Bevel and Emboss:
In this step set the Structure. Now in structure Style will be Stroke Emboss, Technique to Smooth, Depth set to 1000%, Direction at UP, Size – 4px, Soften – 0%. And set in the meantime shading where Angles at 120 degree, Altitude at 30 degree. Highlight Mode with Screen and Opacity will 75%, Shadow Mode also multiply and Opacity to 53%. Now press OK.
Color Overlay:
Color: Blend Mode at multiply with #336666, Opacity will be 12%. Now press OK.
Stroke:
In the Structure set the Size at 4px, Position at Inside, Blend Mode at Soft Light, Opacity at 100%. And set the Fill Type at Pattern. Click OK.


