How To Straighten a Photo in Photoshop

In this Photoshop tutorial, we are going to share a quick and easy way to straighten a crooked photo. If you do not use a tripod on a regular basis while taking photos, you are likely to have some of your photos crooked. Luckily Photoshop makes it unbelievably easy to straighten them with just a few simple steps.
In this tutorial, we are going to use the below image to show how to straighten a crooked photo in Photoshop.
Step 1: Select the Ruler tool.
The best way to straighten an image in photoshop is to do it by Ruler tool. In this way, there is actually no guesswork along the way. Because as long as there is something to straighten in an image, photoshop will do most of the work for us. The Ruler tool is hidden beneath the eyedropper tool. So to select it, you will need to click and hold on to it.
Step 2: Click and drag along something that is crooked and needs to be straightened.
Look for something in your image that should be made straight, either horizontally or vertically. Then click, hold and drag along the edge of the crooked surface with the Ruler tool. So, Photoshop learns how crooked the surface or object is. You can release the mouse button when the other end of the surface is reached. This will make a thin line along the surface from the first point to the last point. Photoshop will use the angle of this line to determine how much the photo needs to be rotated in order to straighten it.
If you look at the top options bar, you can see the angle of the line that is just drawn displayed to the right of the letter A. Photoshop will rotate the photo as per this angle to straighten it.
Step 3: Select Image>Image Rotation> Arbitrary from the top menu bar.
Once you have drawn the line along the crooked surface with the Ruler tool, go to Image>Image Rotation> Arbitrary from the top menu bar. This will show off the angle of the line drawn i.e. the angle to rotate the image to make it straight.
Step 4: Click Ok to rotate the image and straighten it.
All we need to do right now is to click Ok on the rotate canvas dialogue box and get out of it. Photoshop will now rotate the image without any guesswork and make it straightened.
Step 5: Crop the image with the crop tool.
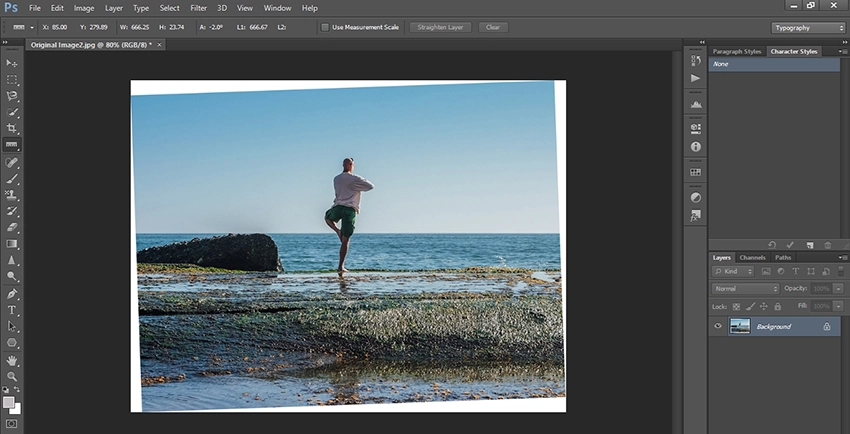
Due to the rotation of the image inside the window, some white spaces appear around the canvas outside the image. We will need to cut off those white areas using the Crop tool. Press C on the keyboard to select the Crop tool or select it from the toolbar.
Once the crop tool is selected you can drag along the four corners or along the four sides to adjust and select the areas you want to keep on your image. Once the final adjustment is done, you can press Enter on the keyboard or click on the Move tool to apply the crop. And, finally, we got our straightened image.
Conclusion
So, we have shared a way to straighten an image by using the Ruler tool in Photoshop. There can be other ways to achieve the same results. Please explore and learn different techniques to straighten an image in Photoshop. Hope you enjoyed this tutorial.


