How to Blur Edges in Photoshop

To focus proper attention on a photo, blurring edges can be a better method to be implemented. The process goes with blending it to white or transparent. In this article, we have come with two different ways (masking and selection) on how to blur edges in Photoshop so that you find the best solution with less effort and complexity.
How to Blur Edges in Photoshop (Masking Method)
Step-1
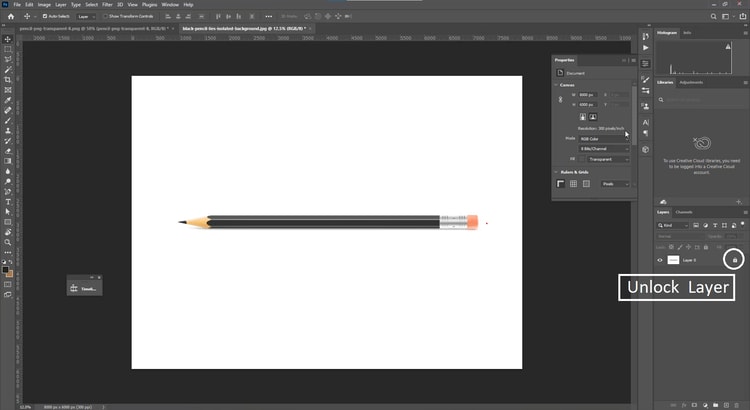
After opening the image in Adobe Photoshop, do unlock the layer by clicking the padlock symbol.

Step-2
From the properties menu, go to Quick Actions>Remove Background.

Step-3
Now, from the Layer option, choose ‘Select and Mask’ to edit the selective areas of the image. Here are the keyboard shortcuts to open this option-
For Windows, press Ctrl+ALT+R
For Mac, press Cmd+Option+R

Step-4
The next step comes with following the basic ‘Select and Mask’ properties. Here, you’ll find the options like Transparency, Refine Mode, Edge Detection, Global Refinements, and more to make the necessary changes according to the requirements.

Blur Edges in Photoshop (Selection Method)
Step-1
Open the image and use Lasso or any selection tool to select the object.

Step-2
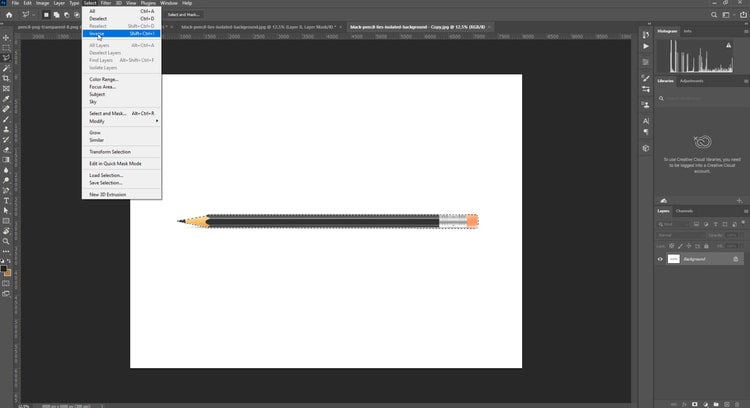
Apply the ‘inverse’ option from the select menu to inverse the selection in the image. This way, designer can swap the selection efficiently.

Step-3
Now, unlock the layer from the boxed padlock symbol.

Step-4
Then, delete the background.

Step-5
Now, from the select menu, choose Modify> contract.

Step-6
Then, open the Select menu, and Modify>Contrast.

Step-7
Then, from the Filter menu, go to Blur> Gaussian Blur.

So, these are the efficient methods that professionals usually implement to retrieve the best outcome to blur edges using Photoshop. Apart from these, there are also some online tools for doing such operations. But the fact is- you have less chance to get the expected result like the mentioned methods.
So, which one seems more comfortable to you? Let’s reveal your thoughts after trying both.


