How to Design Golden Flame

Source: vectorandraster.blogspot.com
For designing a commercial image or creative work you can show your talent making a Design Golden Flame in Adobe Photoshop. Lets see how.
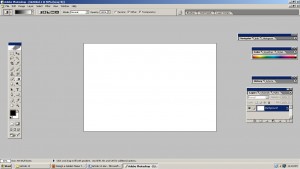
Open Adobe Photoshop and open a new document which size I prefer 1200*800px, then fill the background color by black color. On the background type, here who favor which font, doesn’t matter to select any font, I just wrote some texts onto it.
Now we are in second layer. I applied the layer blending options. From style select outer glow, inner glow, bevel and emboss-contour, stroke.
Now set in the outer glow-structure-blend mode (screen), opacity (75%), noise (0%, noise always be 0 so that image looking clear), I choose color #a3b201. Into the elements techniques (softer), spread (0%), size (10px). Where set quality range (55%), jitter (0%).
In the inner glow-structure-blend mode (screen), opacity (65%), I choose color white. Into the elements techniques (softer), source (edge), choke (0%), and size (43px). Where set quality range (55%), jitter (0%).
In the bevel and emboss, structure (inner bevel), technique (smooth), depth (134%), direction (up), size (40px), soften (0%). Where I set shading angle (120 degree) also select use global light, attitude 30 degree, highlight mode (screen), opacity (75), shadow mode (multiply), opacity (75%).
Set into the contour range 40%.
For stroke set structure (size (3px), position outside, blend mode normal, opacity 55%) and in the fill type set color #efa1a1. Here you saw an effect on your image.
Copy this layer 5 times. Intended for every duplicate layer, slightly regulate every layer’s position on the image; here for creating more depth just alter opacity of every duplicated layer.
Again copy that text layer once. Rasterizing the copied text layers in the mean time merge all the duplicated layers as one. Onto the merged layer I apply the Gaussian Blur Settings. Where set radius 6.6px.
Merge layer to “Hard Light” from blending mode and set it name to another name where I set “Glow”. This will prolong to use the layer used for the next step.
In this step duplicate this “Glow” layer more than 2 times, it can be 3 times. Here from upper to lower, adjust every layer’s opacity and blending mode.
At the Copied layer 1: set Blending mode at vivid light, where Opacity (90%).
For copied layer 2: set Blending mode at overlay, where Opacity (80%).
For copied layer 3: set Blending mode at soft light, where Opacity (70%).
“Soft Smoke texture” Load into the Photoshop, with a 20px feather setting use the Lasso Tool, from smoke texture select a portion, onto the text document copy and paste it. Use the Free Transform tool from edit- Free Transform or (Ctrl +T) to rotate the texture until get your effect.
This layer saved name as “Flame”, duplicate it a small number of time. Use the Free Transform tool to rotate and resize, so that the shape of every layer differs from each other. And this is applied on each duplicated layer. Furthermore ensure the Smoke Texture cover up the whole text area.
Amalgamate those duplicated layers since the previous step where save its name as “Flame”. Merged the layer to “Hard Light” changed the blending mode.
In this layer, adjust the Hue and Saturation and for set this press Ctrl+U. In where have to set Hue (+60), saturation (-20) and lightness (0).
At a standstill on the “Flame” layer, use a soft round brush with different flow and use opacity to create depth.
Now duplicate these “Flame” layer 3 epochs. Here lay down the layer blending mode of the replacement layers from bottom to top the same as “Hard Light”, “Overlay”, and “Overlay”.
Now we include a quantity of smoke in the region of the text so it doesn’t appear too isolated. For doing this, copy the “Flame” layer more than one time, eliminate the mask. Desaturate these duplicate layers, change mode to “Screen” and decrease the opacity to around 30% from the blending mode.
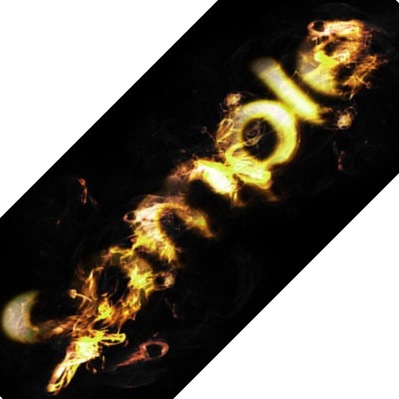
The final image is:


